What you will need:
1 yard of fabric
2- 1.5" D rings
1/2 yard of boning (preferably white)
1/4 yard of terry cloth
100% cotton thread
Ok! Lets get started! If you need to blow the picture up, just click on it to get a closer look, fyi.
Iron your fabric with it folded the way it comes off the bolt. Cut the salvage end off and then cut a 3 1/2" strip and a 30" strip. You will have some leftover fabric which can be used to make a matching burp cloth or baby bib.
Unfold your fabric and iron the crease out on both pieces of fabric. Take your 3 1/2" strip and cut it at 9 inches as pictured above. These 2 strips will be the straps that tie around your neck.
Now you are going to take the 2 shorter sides of your main fabric and fold them in 1/4-1/2 inch and iron.
Then fold again and iron.
Now do the same with one of the long sides on the fabric. If your fabric has a bottom, then do this step on the bottom side of the fabric. Then do the same thing on the top side of the fabric except instead of 1/4-1/2 inch fold, you want to do 3/4-1 inch fold. The top side needs to be a little bigger because of the boning we will be sewing in.
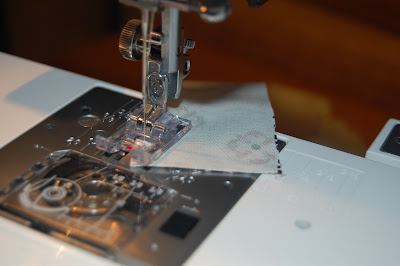
+Take your smaller 3 1/2" strip, fold hot dog style with good side facing in. Sew 1/4" with a lock stitch on both ends. (P.S. sorry my nails are gross)
Now take the longer strip of the 3 1/2 fabric and do the same thing. Fold hot dog style, good sides facing in, and sew all the way down. EXCEPT this time when you get about 3 inches from the end, sew diagonally towards the opposite corner.
Cut off excess fabric with about 1/4" seam allowance.
Take both straps, flip inside out (Very tedious part) and iron both flat with the seam down the middle.
Again, sorry for my gross nails, take the short strap, fold in half with the seams on the inside and iron flat.
Take your long strap and sew both sides with 1/4" seam allowance. If you start at the raw edge and sew towards the pointed end, you can lower the needle and pivot the fabric when you are ready to sew the other side. It'll give you a clean, professional look..
Take the 2 D rings and slip them in the crease of the folded strap. Sew up one side with 1/4" allowance and when you get close to the D rings, lower your needle, raise the pressure foot, and pivot the fabric. Sew until your about 1/4" from the end, then pivot the fabric again and sew to the end. It will look like the picture above while sewin and below when finished.
Now take the ends of the straps and fold them about 3/4 inch and iron flat. When you fold up the fabric, make sure to fold it on the best side. This will be the front facing part of the straps.
(The picture above shows the front facing fabric.)
This is what you should have so far.
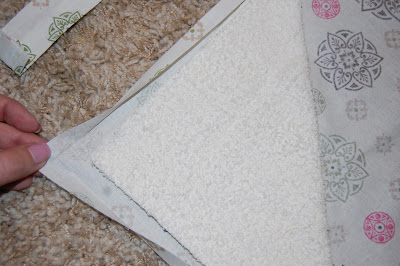
Take your terry cloth, fold into a triangle like above, and cut a straight line.
Do this twice so you have 9" squares of terry cloth
Fold both squares in half so they make triangles. Iron flat.
Take each triangle and place them in bottom corners.
Fold the ironed edges over the terry cloth. If you would like, pin the fabric and terry cloth together.
Sew the 2 sides first.
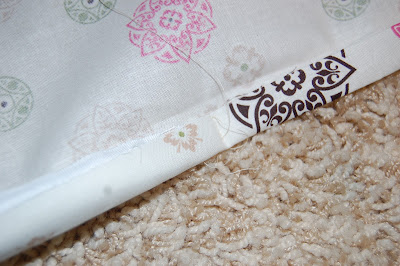
Then sew the bottom
This is what it should look like so far.
This next part isn't necessary, but it adds small pockets to store nursing pads or binkies while nursing. Sew 2 lines (Like photo below) on each terry cloth corner.
Now take your boning and center it on the top unsewn edge. Fold the fabric over once. With the boning arching towards you, slip it under the fold and sew each side of the boning to hold it in place. I do this so the boning doesn't slip around after the nursing cover has been washed a few times.
Fold the fabic again so the boning is arching away from you.
Take your straps and place them over the stitches that are holding the boning in place. Pin them if desired. It doesn't matter which strap goes on which side, its your preference.
Sew all the way down on the left side. Make sure the straps are snuggly folded around the main folds.
Sew again on the right side of the fold now, so you have a stitch on each side of the boning. The will really secure the boning.
This is the boning and long strap
This is the boning and D ring strap
This is the front of the finished product
There is the binky pocket and wipe to clean baby's little mouth after feeding.
Well I hope this was detailed enough! And if you don't want to tackle this project, you can always purchase one at my shop Mommy's Baby Boutique


My neighbor swears by the hooter hider. She has 4 kids and says that it is by far the good quality, most flexible, convenient and comfortable for traveling.
ReplyDeletehooter hider
What are the finished dimensions of the cover?
ReplyDelete